Configure Serial Port
1 Overview
Hesai lidar products provide a standard serial port connection method, allowing developers to interact with the lidar via the serial port. This enables easy access to lidar point cloud data and configuration of lidar functions.
Note: Currently only JT16 supports serial port configuration.
2 Application Method
Taking JT16 as an example, the specific configuration method for serial port connection is as follows:
2.1 Driver Installation
The USB-to-RS485 cable provided with JT16 uses a third-party chip, and the corresponding driver file needs to be installed.
The installation methods for Windows and Ubuntu systems are as follows:
2.1.1 Windows System
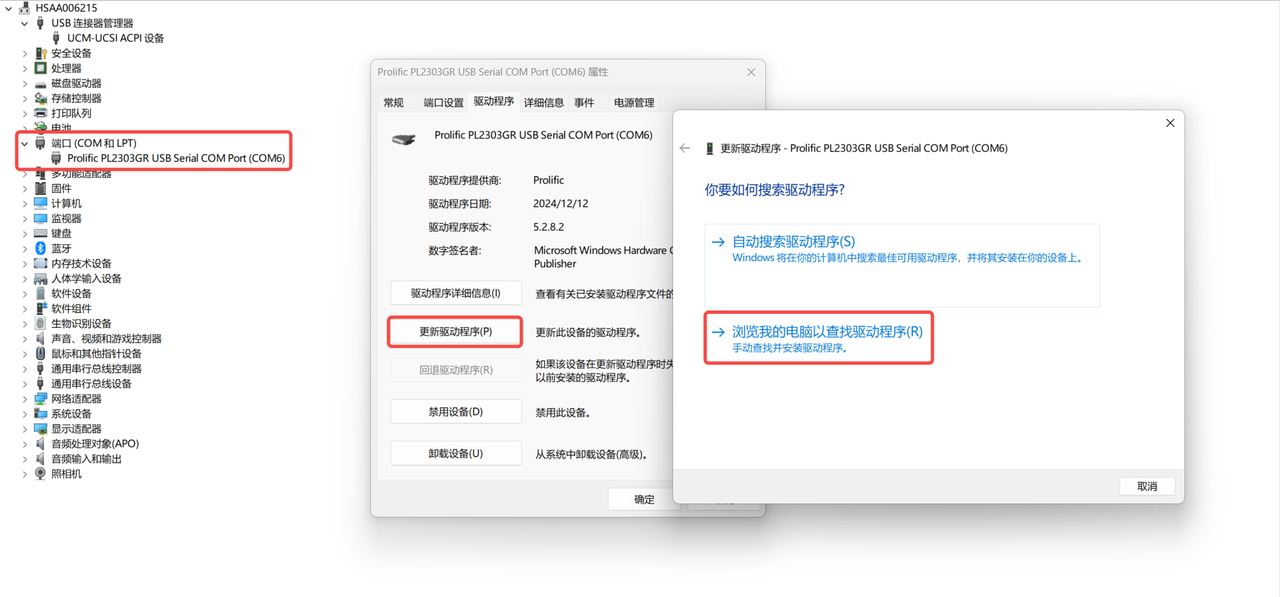
- Open Device Manager.
- Connect the lidar.
- Install the driver (as shown below, the driver file can be downloaded here).
2.1.2 Ubuntu System
- Check if the system has a built-in driver:
uname -r
Note: If the kernel version is 5.5 or above, the system already has a built-in driver. For kernel versions 2.6.15 to 5.4, proceed with the following steps:
- Download the driver:
a. Download the ZIP driver file, which contains multiple driver versions (the driver file can be downloaded here).
b. Locate the subfolder corresponding to your Linux kernel version in the ZIP file.
c. Copy the subfolder to a local directory.
- Install the driver:
a. Run the following command in the local directory to gain root privileges:
sudo su
b. Compile and install the driver by running the following command:
make all
c. Open the kernel module file in a text editor by running the following command:
sudo gedit /etc/modules
d. Add a new line at the end of the file, input "pl12303", save, and close the editor.
- Restart the Ubuntu system.
- Reconnect the USB-to-RS485 cable.
2.2 Configuration Process
2.2.1 Windows System
Method 1:
-
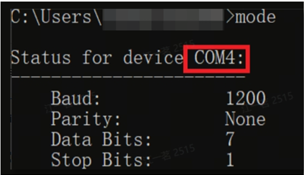
View all port numbers:
a. Open the Command Prompt window.
b. Run the following command:
mode
-
Plug and unplug the RS485 cable to determine its serial port number.
Format: "COM" + number
Method 2:
-
Open Device Manager.
-
In the device list, double-click [Ports (COM & LPT)] (refer to Driver Installation - Windows System).
-
Record the RS485 port number (the port name of RS485 usually contains the model of the USB-to-RS485 chipset).
Format: "COM" + number
2.2.2 Ubuntu System
-
View all serial ports and their permissions:
a. Open the terminal.
b. Run the following command:
ls -l /dev/ttyUSB*
Enabled serial ports: Start with "crw-rw-rw".

Disabled serial ports: Start with "crw-rw----".

-
Plug and unplug the RS485 cable to determine its serial port number.
Format: "/dev/ttyUSB" + number
-
If there are disabled serial ports, run the following command to enable all serial ports:
sudo chmod 666 /dev/ttyUSB*
- Repeat step 1 to confirm the status of all serial ports again.
3 Point Cloud Visualization via Serial Port
Launch PandarView2 and follow the steps below to view real-time point clouds sent by JT16 via serial port:
-
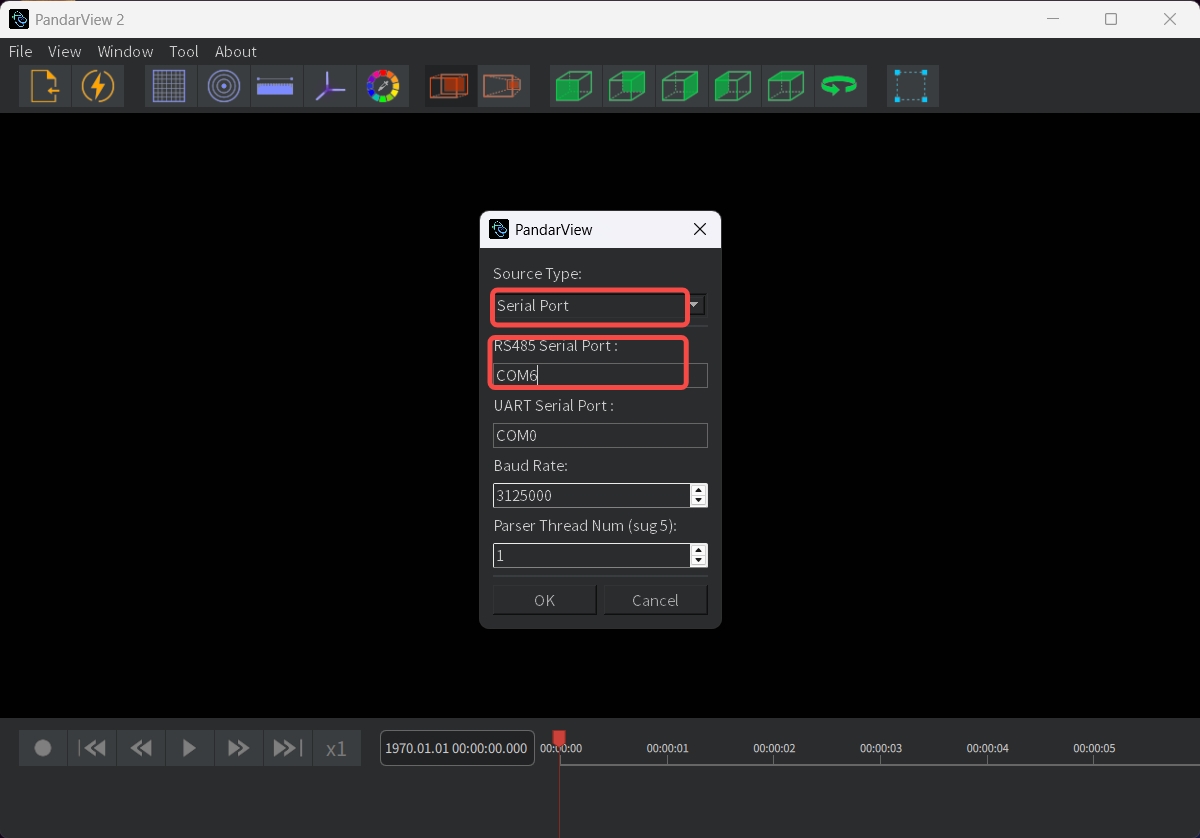
Click the [Listen for Data] button on the toolbar to open the configuration window.
-
Configure the following parameters:
Source Type Select Serial Port RS485 Serial Port Enter the port number of RS485 Baud Rate Default: 3000000; if it fails, try 3125000 -
Click [OK] to start viewing real-time point clouds.
Note: Users can refer to Use PandarView - Download and Installation for instructions on installing the PandarView2 software.
Find it useful?