Use Wireshark
1 Overview
Wireshark is an open-source network protocol analysis tool that can capture and analyze network packets. It helps users understand network communication, troubleshoot network issues, and perform network security analysis. This document introduces common operations in Wireshark to meet the needs of users for preliminary data analysis and troubleshooting when using lidar.
2 Common Operation Instructions
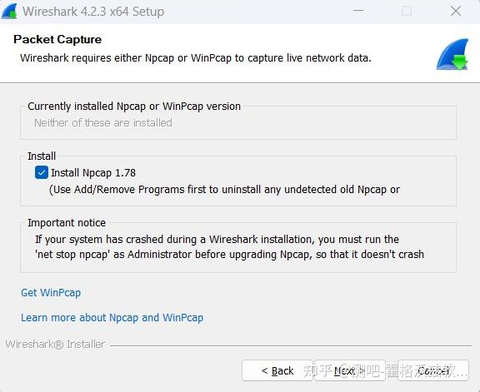
2.1 Download and Installation
Visit the Wireshark official website to download the installation package for the correponding operating system. Follow the installation wizard to complete the installation. Ensure the option of installing Npcap is checked (used for packet capture drivers).
After installation, launch the Wireshark application.
2.2 Capturing Data Packets
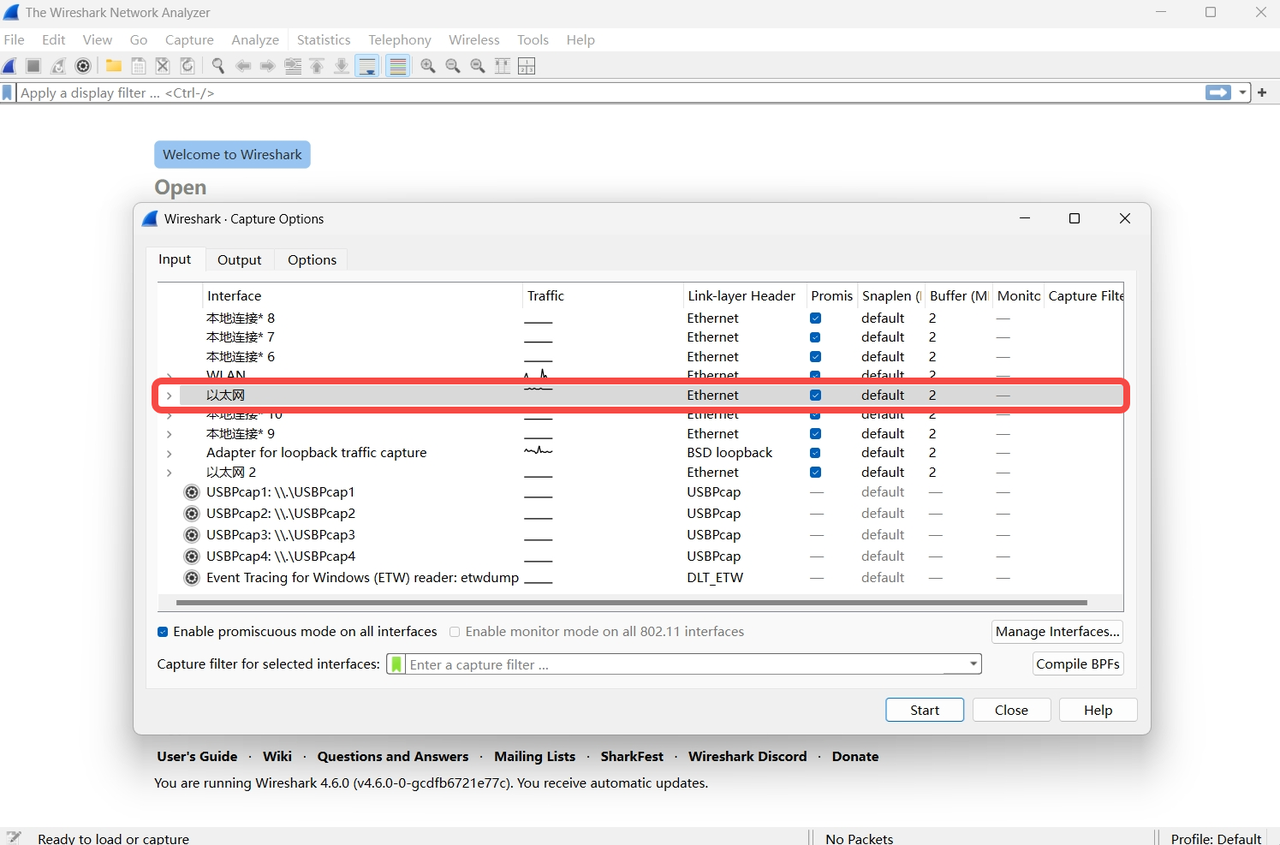
2.2.1 Select a Network Interface
-
After launching Wireshark, click "Interface List" under the "Capture" menu on the main interface.
-
In the pop-up "Capture Interfaces" window, the available network interfaces from the computer will be displayed (e.g., Ethernet, WLAN).
-
Select the network interface that the data packets need to be captured from and click the "Start Capturing Packets" button corresponding to that interface (the Start button in the window or the blue shark fin icon in the main toolbar, as shown below).
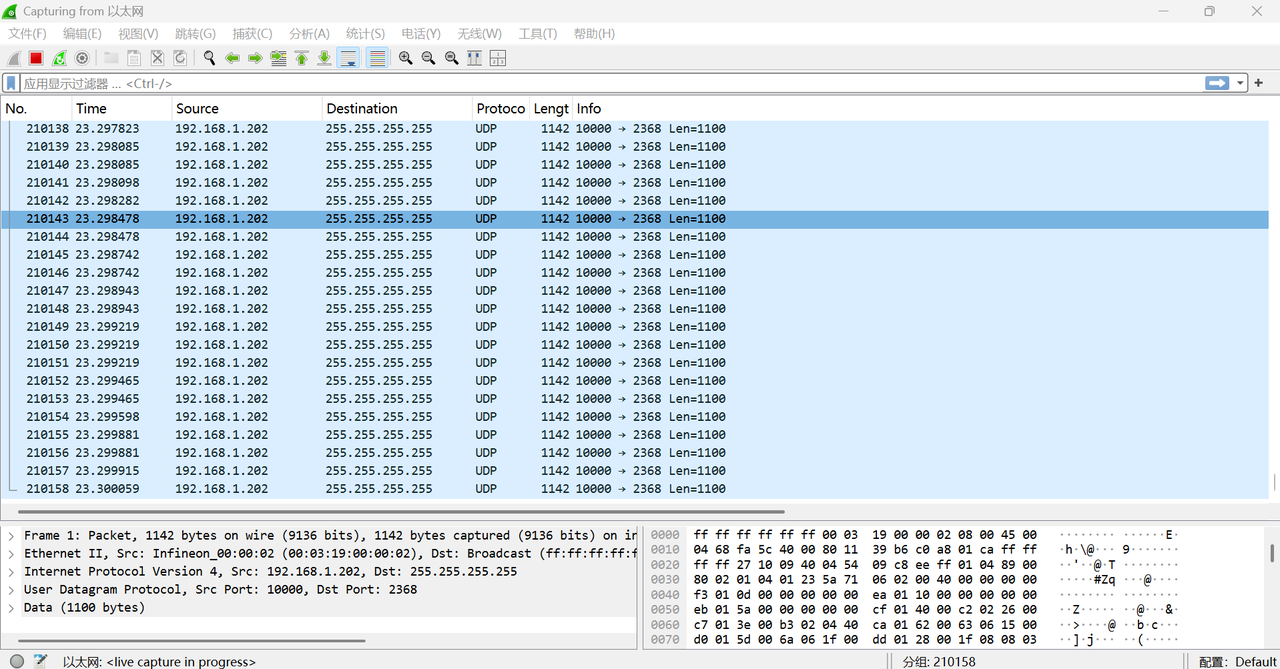
2.2.2 Start Capturing
After clicking the start capture button, Wireshark will immediately begin capturing network packets on the selected interface. The packet list area on the main interface will display the captured packet information in real time (as shown below).
2.2.3 Stop Capturing
To stop capturing, click the "Stop Capturing Packets" button in the main toolbar (the red square icon shown above).
2.3 Viewing IP/MAC Address Information
-
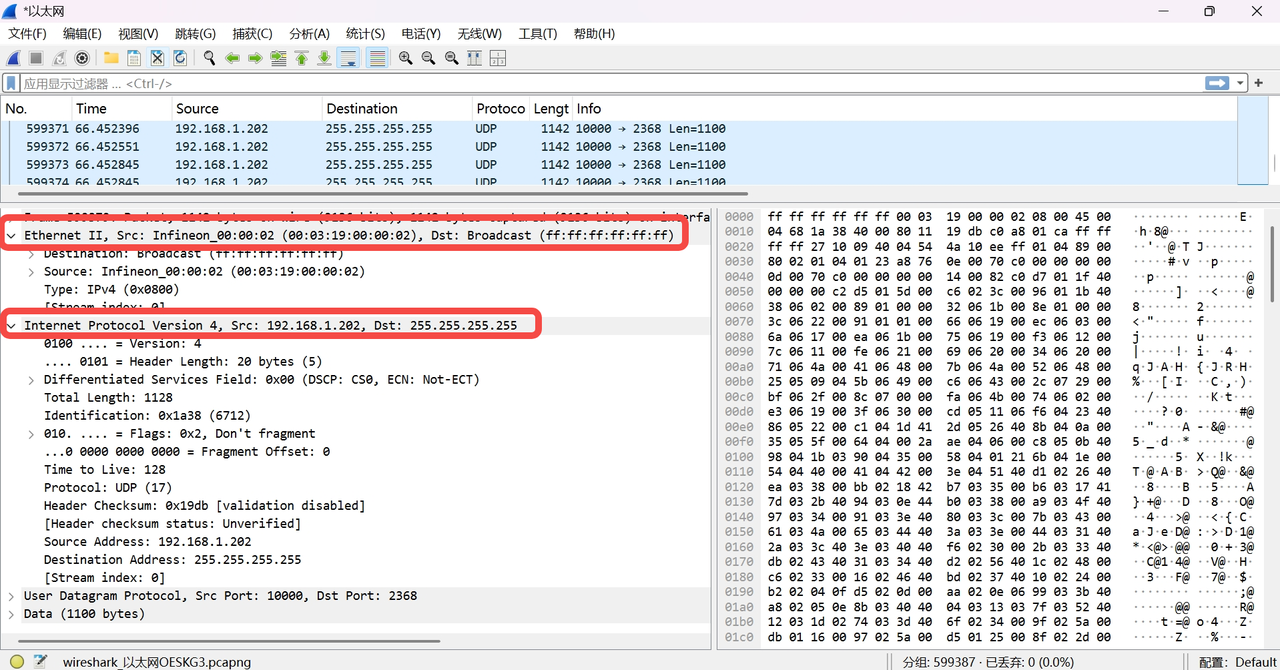
In the packet list area, select a packet for which the detailed information needs to be viewed.
-
In the "Packet Details" panel below, expand the "Ethernet II" section to view the source MAC address and destination MAC address (as shown below).
-
Expand the "Internet Protocol Version 4 (IPv4)" or "Internet Protocol Version 6 (IPv6)" section to view the source IP address and destination IP address (as shown below).
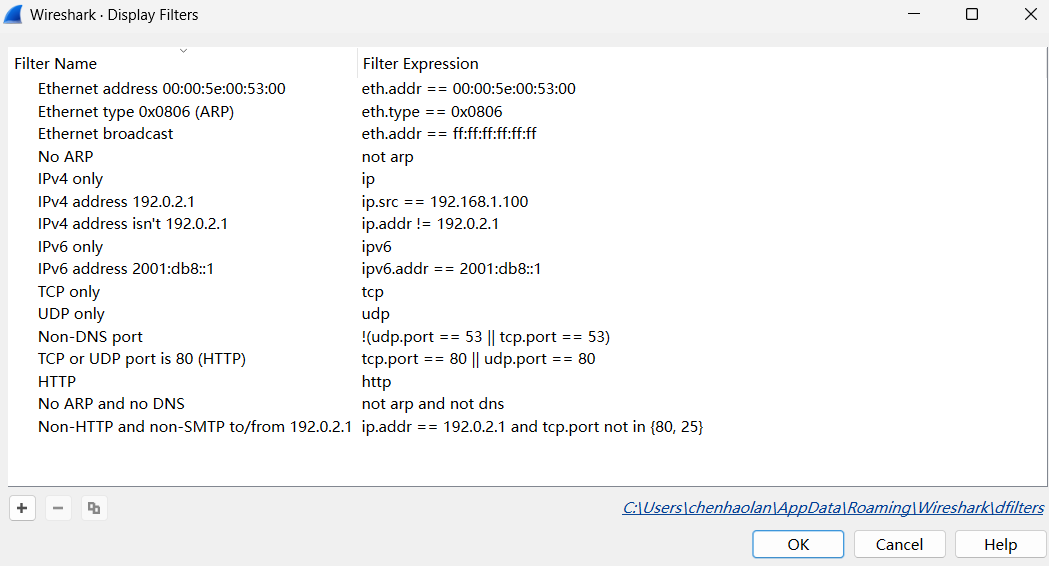
2.4 Filtering Packet Types
2.4.1 Basic Filter Syntax
Wireshark provides powerful filtering capabilities. Common filter syntax includes:
- Filter by Protocol: Enter the protocol name directly, such as
http,tcp,udp,icmp, etc., to filter packets of the corresponding protocol. - Filter by IP Address:
ip.src == 192.168.1.100(source IP address is 192.168.1.100)ip.dst == 192.168.1.1(destination IP address is 192.168.1.1)ip.addr == 192.168.1.100(source or destination IP address is 192.168.1.100)
- Filter by MAC Address:
eth.src == 00:11:22:33:44:55(source MAC address)eth.dst == aa:bb:cc:dd:ee:ff(destination MAC address)
- Combine Filters: Use logical operators such as
and,or,notto combine filter conditions, e.g.,tcp and ip.src == 192.168.1.100(TCP protocol and source IP is 192.168.1.100).
2.4.2 Applying Filters
-
Enter the filter condition in the filter bar (Filter) on the Wireshark main interface.
-
Click the "Apply" button on the right side of the filter bar (or press Enter). The packet list area will only display packets that meet the filter condition.
-
To clear the filter condition, click the "Clear" button on the right side of the filter bar (or delete the content in the filter bar and press Enter).

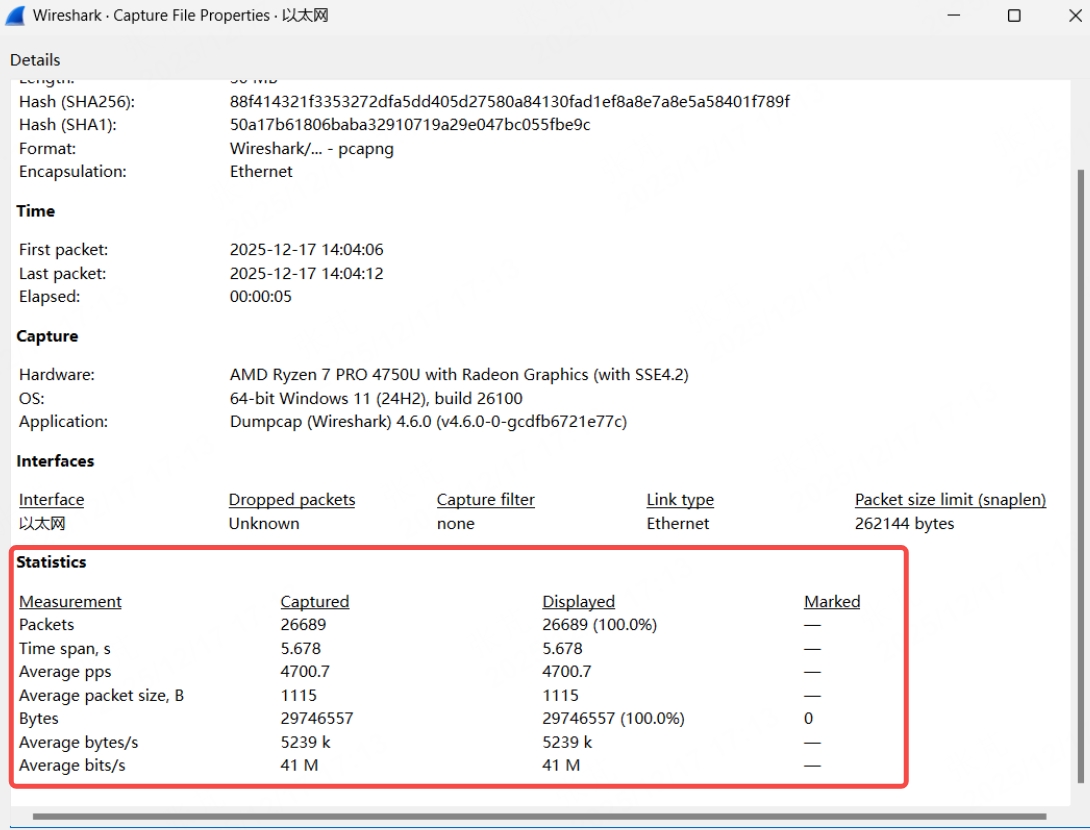
2.5 Viewing Data Statistics
-
In the Wireshark menu bar, click "Statistics" -> "Summary".
-
In the pop-up "Summary" window, user can view basic statistics such as the total number of captured packets, capture duration, and average rate, as shown below.
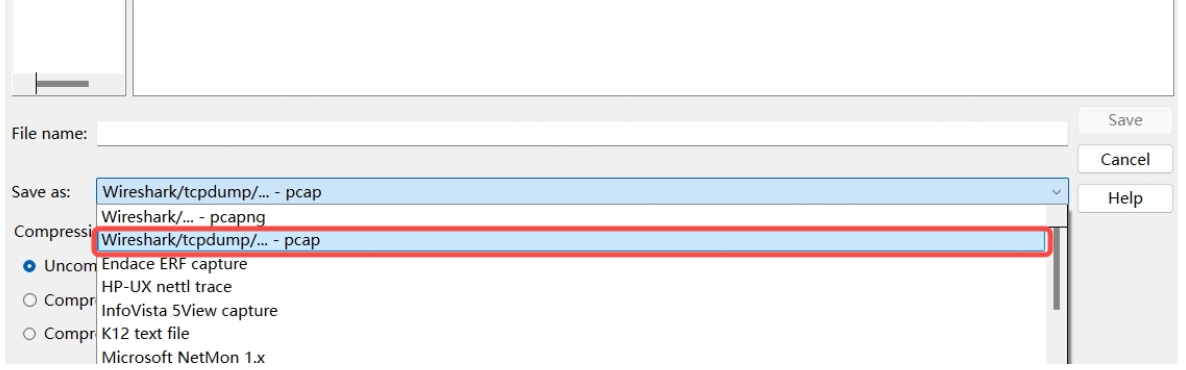
2.6 Saving and Exporting Packets
2.6.1 Save All Packets
- Click "File" -> "Save" or "Save As."
- In the "Save Capture File" window, select the save path, enter the file name, and the file format will default to Wireshark capture file format (.pcapng). Click "Save."
Note: For Hesai lidar's outgoing point cloud UDP data, when capturing with Wireshark the save file format needs to be changed to .pcap (an option below .pcapng) in order to display it properly in PandarView!

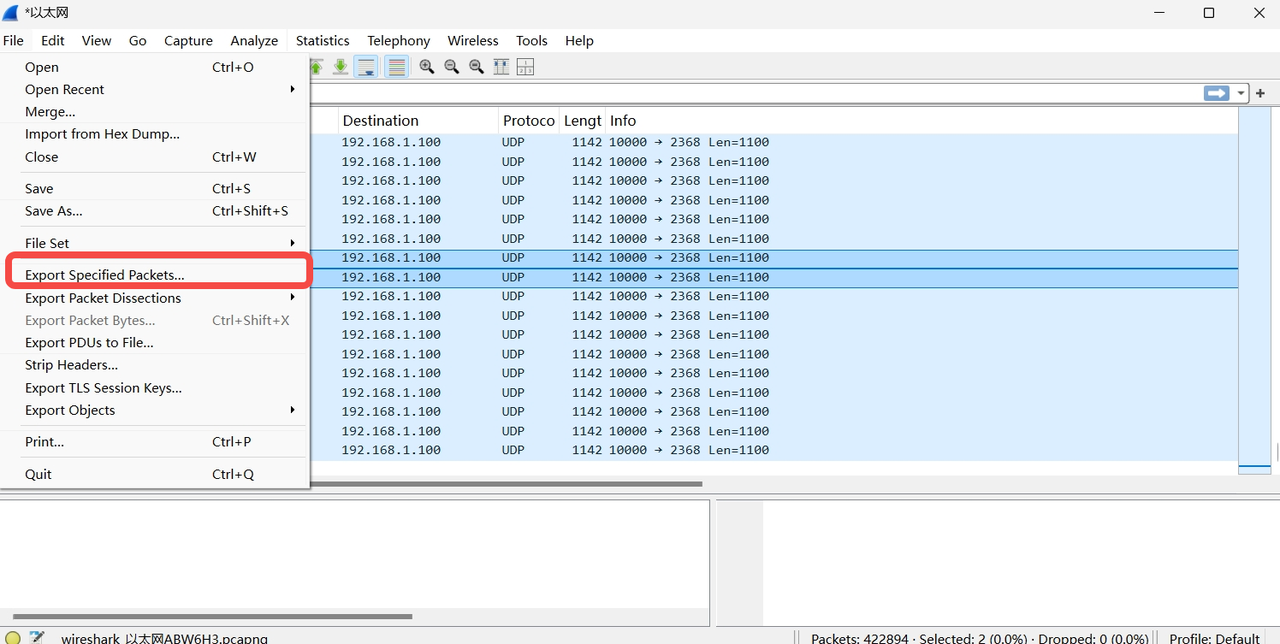
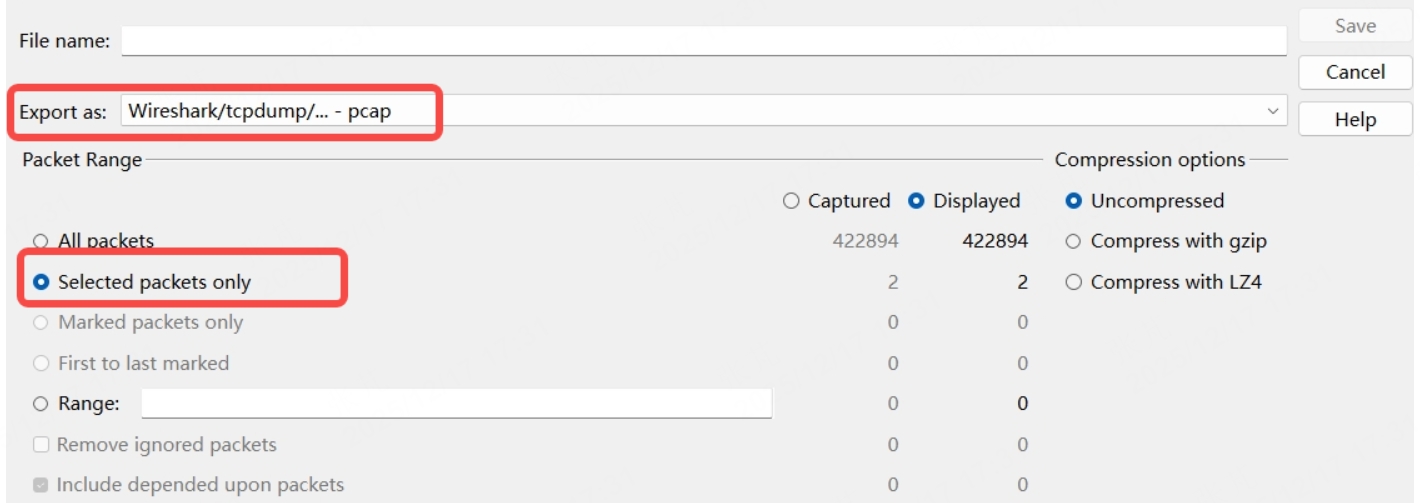
2.6.2 Export Specific Packets
- Select one or more packets for export (hold down the Ctrl key to select multiple packets).
- Click "File" -> "Export Specified Packets."
- In the "Export Specified Packets" window, select the export range (e.g., "Selected Packets"), save path, and file name, then click "Save."
3 Additional Tips
-
Using Wireshark for packet capture requires certain permissions. On Windows systems, user may need to run Wireshark as an administrator, or on Linux systems, user may need to use root privileges.
-
For a large number of packets, using filters can improve analysis efficiency and avoid information overload.
-
Capturing packets on public networks may involve privacy and legal issues. Ensure user have proper authorization before capturing packets.
For more advanced Wireshark usage, refer to the Wireshark official documentation or community tutorials (e.g., Wireshark Wiki).
Find it useful?