Troubleshooting
1 Overview
During the application of lidar, users may encounter various issues affecting its normal operation. This document aims to help users quickly troubleshoot and resolve the common issues encountered when using Hesai lidar products.
2 Basic Operation Issues
2.1 How to Check Whether the Lidar is Starting Properly
Before powering on the lidar:
- Ensure the current ambient temperature meets the operating temperature requirements of the lidar product.
- Ensure the input voltage and current at the power supply end meet the electrical requirements of the lidar product.
- Confirm that the power adapter is functioning properly and all cables (power cables, Ethernet cables, etc.) are securely connected and properly attached.
After powering on the lidar:
- If Hesai standard connection box is used, check the indicator light on the box: Under normal conditions, the blue LED indicator light on the connection box should be always ON (as shown below).

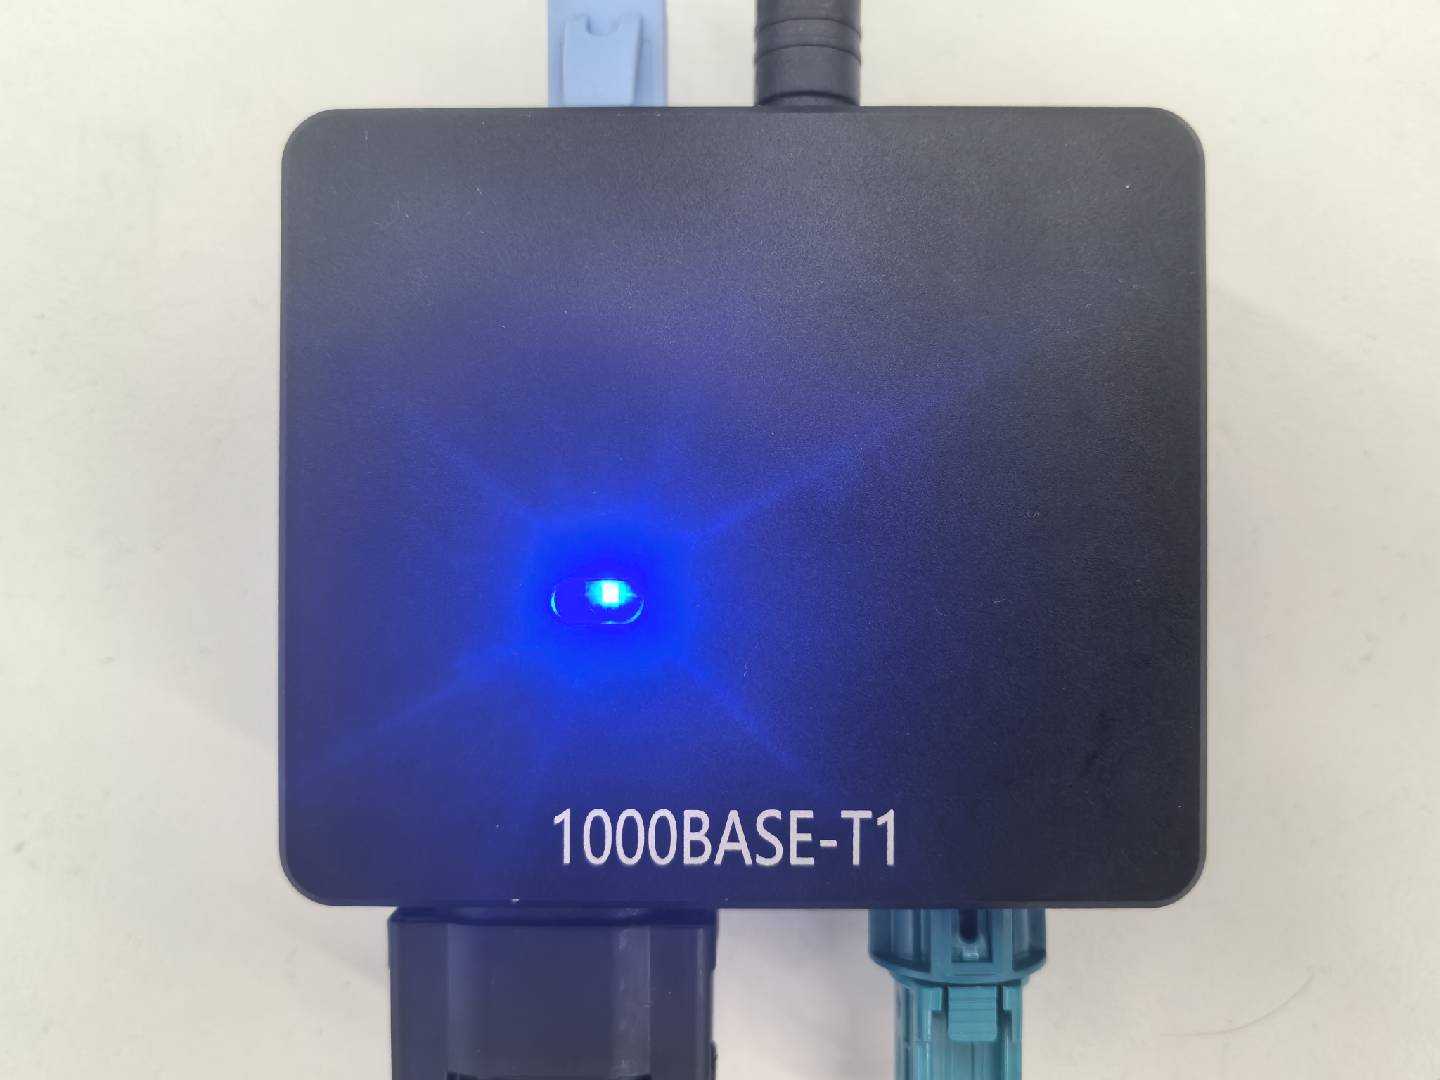
- If the indicator light is off, check the power supply status and hardware connections (if possible, use another working connection box or lidar for cross-testing to confirm if the issue is with the connection box itself).
- If the indicator light is flashing, it may be due to the mismatched Ethernet configurations between the lidar and the connection box (e.g., not the same Ethernet bandwidth settings or mismatched master-slave modes). Please contact Hesai technical support for further troubleshooting.
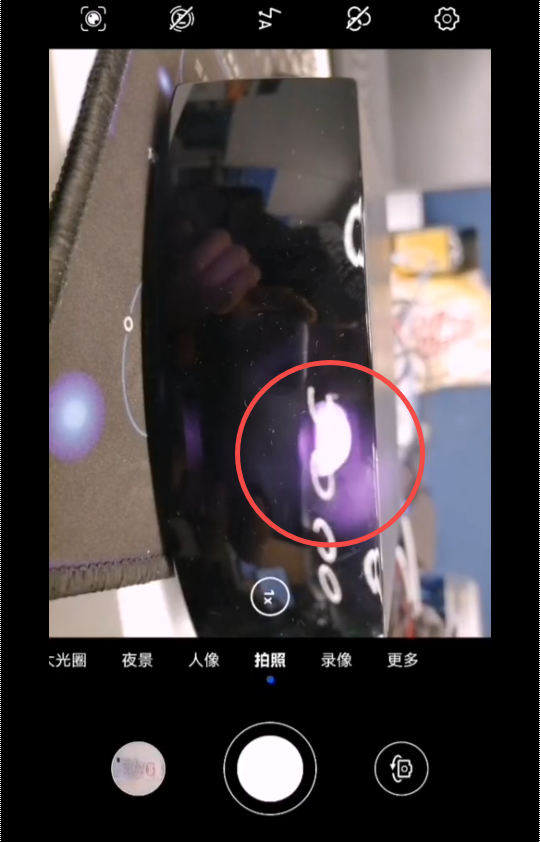
- Check if the lidar is emitting light: Use an infrared camera or a camera capable of detecting infrared wavelengths (recommended: iPhone front camera or Huawei phones) to capture the surface of the lidar's lens and check if there is any visible purple-red flashing spots (similar to the image shown below).

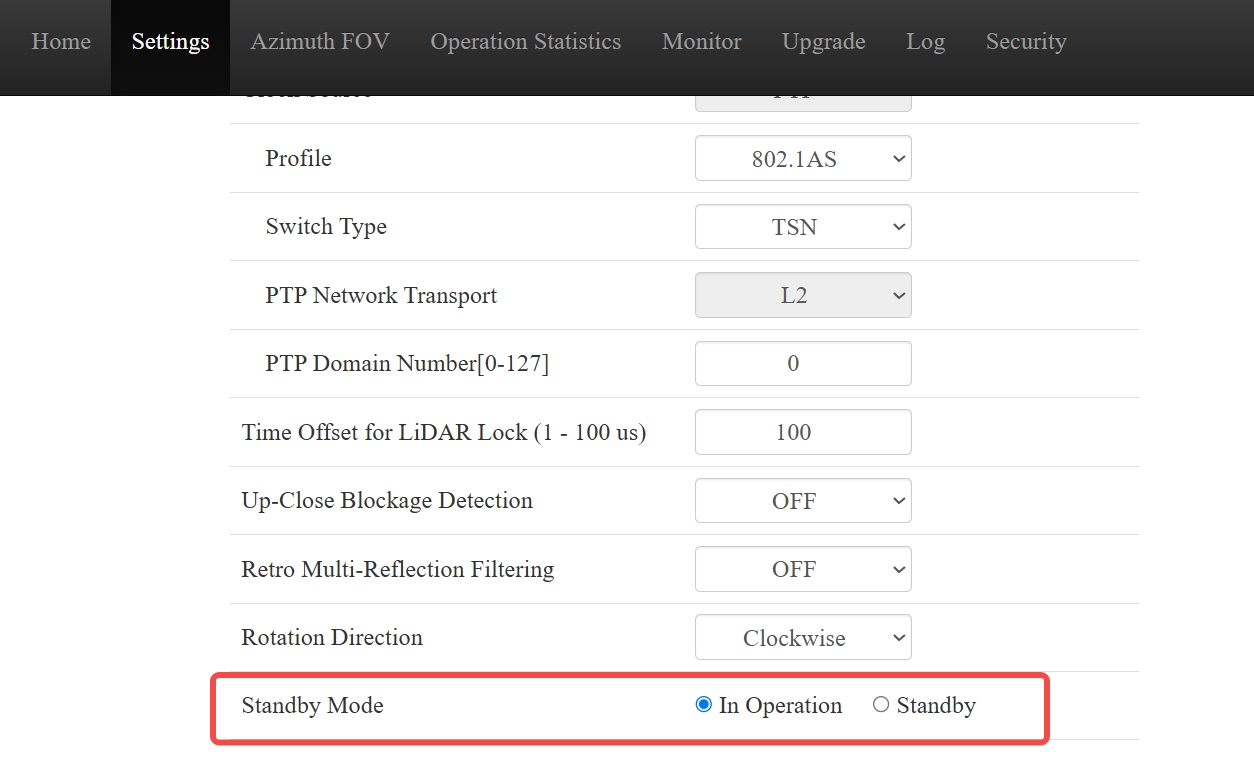
- If the lidar is connected properly but not emitting light, check if it is set to standby mode (in standby mode, the lidar stops rotating and does not emit light). Users can check this via the web interface or LidarUtilities software, as shown below:
Web control page (Pandar series/QT series/XT series)

lidarUtilities interface (OT128 / AT128P)

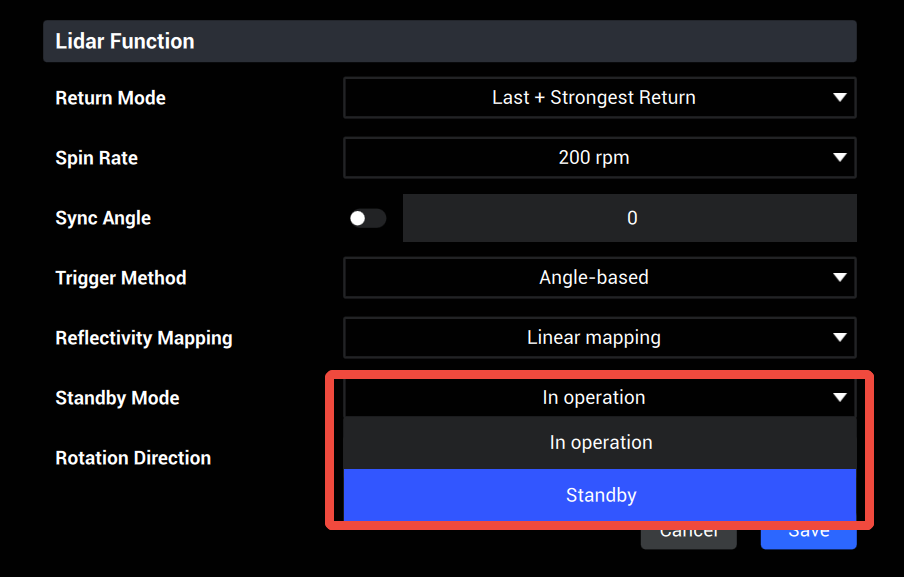
LidarUtilities can be downloaded from Hesai's official website (OT128,AT128P).
Note: If users cannot access the lidar control page via the webpage or LidarUtilities, please refer to Common Ethernet Issues Troubleshooting.
If the lidar still fails to start after following the above steps, please contact Hesai technical support.
3 Point Cloud Display Issues (PandarView2)
3.1 PandarView2 Installation
The latest version of the PandarView2 software and user manual can be downloaded from Hesai official website here. For information on hardware and driver requirements for the host computer (Windows, Ubuntu), supported lidar models and installation requirements, please refer to the PandarView2 user manual.
Note: On Ubuntu operating systems, the PandarView2 installation file is in .bin
format. To install, run the following commands in the directory containing the .bin
file:
sudo chmod +x PandarView_Release_Ubuntu_V2.1.7.bin # Replace with the corresponding version of the PandarView2 installation file
sudo ./PandarView_Release_Ubuntu_V2.1.7.bin
After successful installation, run the PandarView2 software using the following command in the installation directory:
sudo ./PandarView.sh
Before playing point cloud data in PandarView2, ensure:
- The lidar is functioning properly.
- The host computer can receive point cloud UDP packets (verify using Wireshark software).
3.2 Point Cloud Live Display in PandarView2
- Point cloud not displayed
- Check the host computer's firewall
Ensure the host computer's firewall is disabled or allow the PandarView2 program through the firewall (configuration steps shown as below):

- Check lidar Ethernet parameter settings
a. If the lidar is configured in broadcast mode, change the UDP Port option in the PandarView2 - 'Listen for Data' popout to the actual destination port value (default factory setting is 2368, actual value can be obtained from the lidar control page, as shown below).

Web control page (Pandar series/QT series/XT series)

lidarUtilities interface (OT128 / AT128P)

b. If the lidar is configured in unicast mode, set the host computer's IP address to the lidar's Destination IP (this parameter can be obtained from the lidar control page) and change the UDP Port option in the PandarView2 - 'Listen for Data' popout to the actual destination port value.
c. If the lidar is configured in multicast mode, change the UDP Port option in the PandarView2 - 'Listen for Data' popout to the actual destination port value, and select the Multicast IP option in the popout, configuring it to the lidar's Destination IP (this parameter can be obtained from the lidar control page).
Note: For detailed configuration of lidar multicast mode, refer to Configure Ethernet - Multicast.

Note: If the host computer uses an Ethernet-to-USB adapter to connect to the lidar, there is a small probability of point cloud not displaying in PandarView2. It is recommended to use a computer that can directly connect to the lidar via Ethernet cable for point cloud live display.
- Incomplete point cloud display
- Check if the lidar lens is clean (if dirty, clean it according to the "Instrument Maintenance" section in the product user manual).
- Log in to the lidar control page via the webpage or LidarUtilities software and verify if the Azimuth FOV parameter settings are correct (if part of the horizontal FOV is disabled).
- Check if lidar's current motor speed is stable at the preset value (check the Motor Speed value displayed in PandarView2). Ensure the lidar is securely mounted to avoid vibrations during operation.
- Check if the host computer's hardware performance and driver configuration meet the requirements (recommended: at least 16GB RAM, support a dedicated graphics card with correct graphics driver version).
- Check if the Ethernet on the host computer is overloaded or if other devices are transmitting data simultaneously, causing network overload and packet loss. It is recommended to connect only one lidar to the host computer, disconnect other devices and power cycle the lidar to check if the issue persists.
3.3 Point Cloud File Playback in PandarView2
- Point cloud not displayed
- Ensure the PandarView2 software is the latest version from the official website.
- Check if the point cloud file is in
.pcap
format (Note: When recording point cloud files using Wireshark, the default save format is.pcapng
. Users need to manually change it to.pcap
format).

- Check if the UDP packet data length and format in the point cloud
.pcap
file are correct: Use Wireshark to view and compare with the UDP packet length defined in the product user manual (using QT128 as an example, as shown below).

- Abnormal point cloud behavior
- If the point cloud arrangement is irregular, Check if the angle correction file corresponding to the point cloud file has been properly imported (steps shown as below).

- If the point cloud flickers during playback, check if the
.pcap
file has packet loss (use Wireshark or contact Hesai technical support). If there is no packet loss, verify if the host computer's hardware performance and driver configuration meet the requirements (refer to the troubleshooting methods in the live display section), restart the computer or test with another computer.
If other point cloud display issues persist in PandarView2 after following the above steps, please contact Hesai technical support.
4 Network Connection Issues
Refer to Configure Ethernet - Common Ethernet Issues for more details.
5 PTP Time Synchronization Issues
Refer to Synchronize Time using PTP - Common PTP Issues for more details.