Configure Ethernet
1 Overview
Hesai lidar supports the following configuration functions of Ethernet communication:
- lidar IP address configuration
- Destination IP address configuration (unicast, broadcast, multicast)
- Destination port configuration
- VLAN configuration (only supported in some Hesai lidar models)
2 Application Method
2.1 How to establish the network connection between lidar and host computer
2.1.1 Windows OS
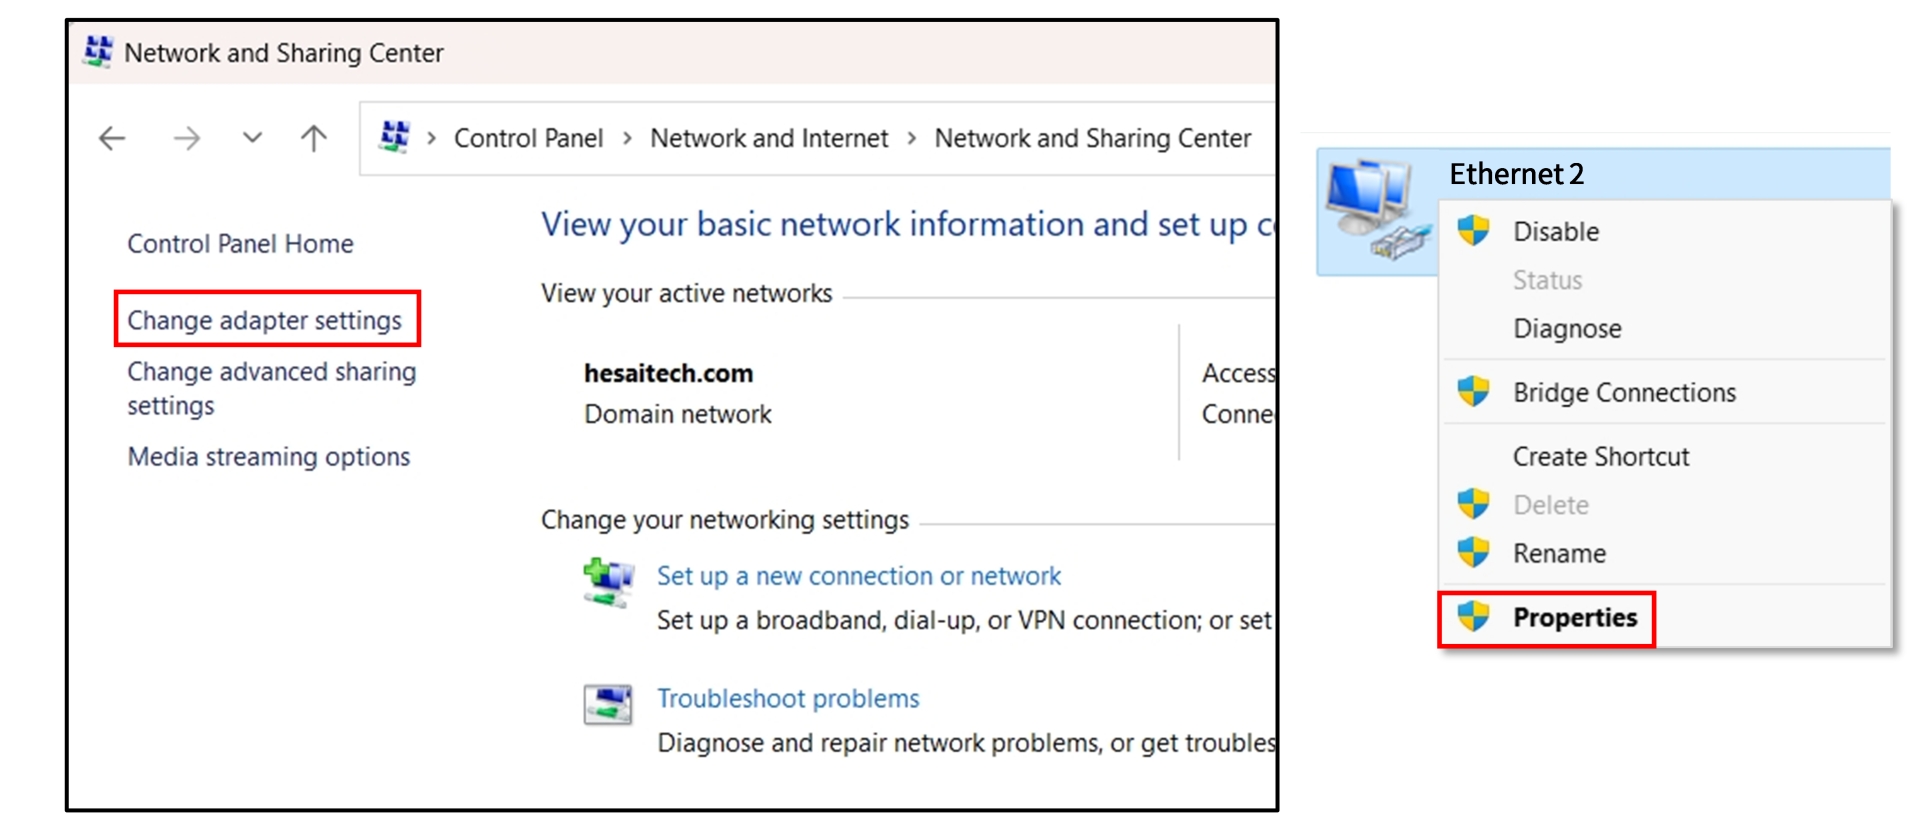
- Open [Control Panel]----Click [Network and Internet]----[Network and Sharing Center]----[Change adapter settings];
- Right click [Ethernet] or [Ethernet X] that is already connected (the left corner of the icon should not show a red cross)----[Properties];
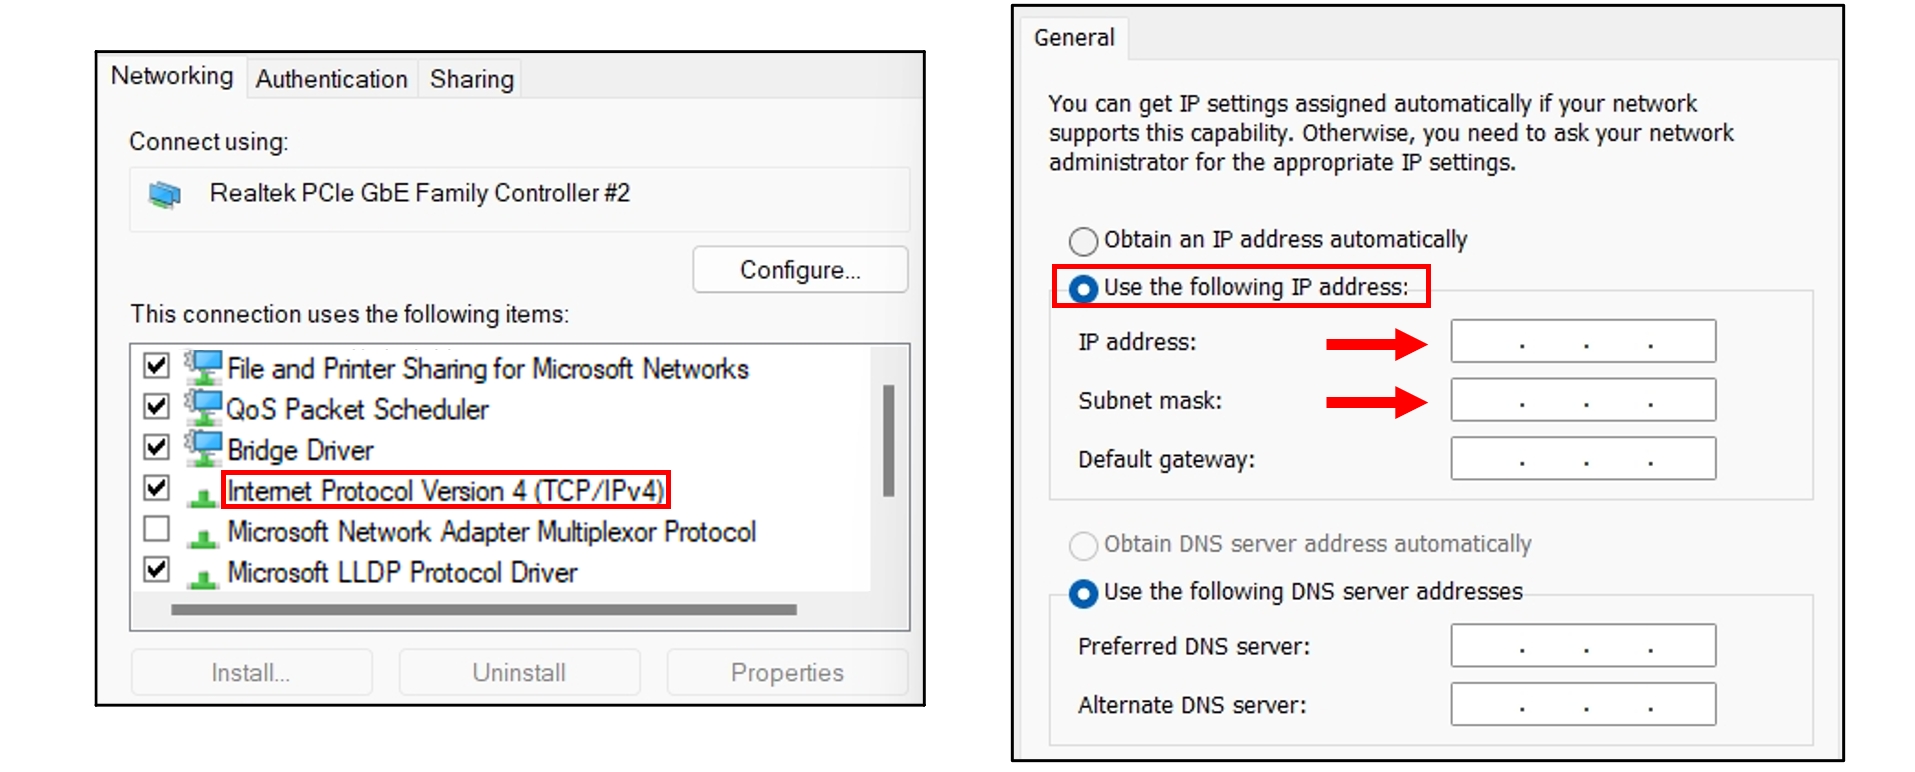
- Double click on [Internet Protocol Version 4 (TCP/IPv4)];
- Select [Use the following IP address]----Enter the IP address and subnet mask of the host computer so that it has the same IP address subnet as the lidar's. For example, the default IP address of Hesai lidar is 192.168.1.201 and the subnet mask is 255.255.255.0, the host IP address can be set to 192.168.1.X (1~200,202~254);
2.1.2 Ubuntu OS
- Run the command in Terminal:
sudo ifconfig ${interface_name} ${ip_addr}; In particular,${interface_name}needs to be replaced with the host computer network interface name,${ip_addr}needs to be replaced with the host computer IP address.
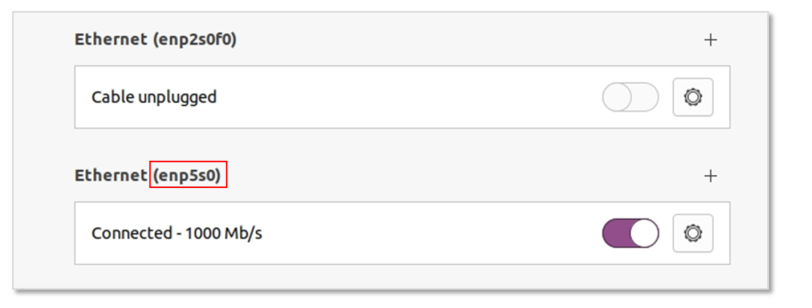
2.1.2.1 How to check the network interface name of host computer
- In the Settings --- Network page, the content in brackets after Ethernet is the network interface name.
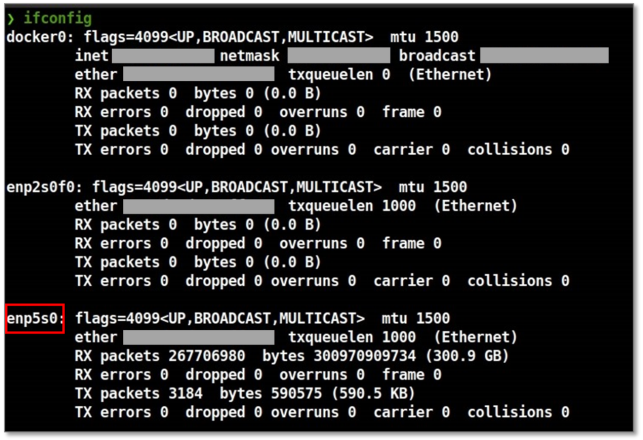
- Run the command:
ifconfig
After completing the Ethernet configuration on the host computer as described above, users can use the ping command in the terminal to check the network connection status between the host computer and the lidar. (For Windows systems, users can open the terminal window by pressing Win+R, typing cmd and pressing Enter):
ping <lidar's IP address> -t
Users can also log in to the lidar's IP address via a web browser (applicable to Pandar series/QT series/XT series models) or use the LidarUtilities software (applicable to OT128/AT128P models) to confirm whether the lidar's control page is accessible. A successfully accessed control page is shown as below:
Web control page
lidarUtilities interface
Note: LidarUtilities can be downloaded from Hesai's official website (OT128,AT128P).
If the host computer's Ethernet configuration is completed but the lidar still cannot be PINGed or its control page cannot be accessed from the host computer, please refer to Common Ethernet Issues Troubleshooting .
2.2 How to implement point cloud data transmission from lidar to host computer
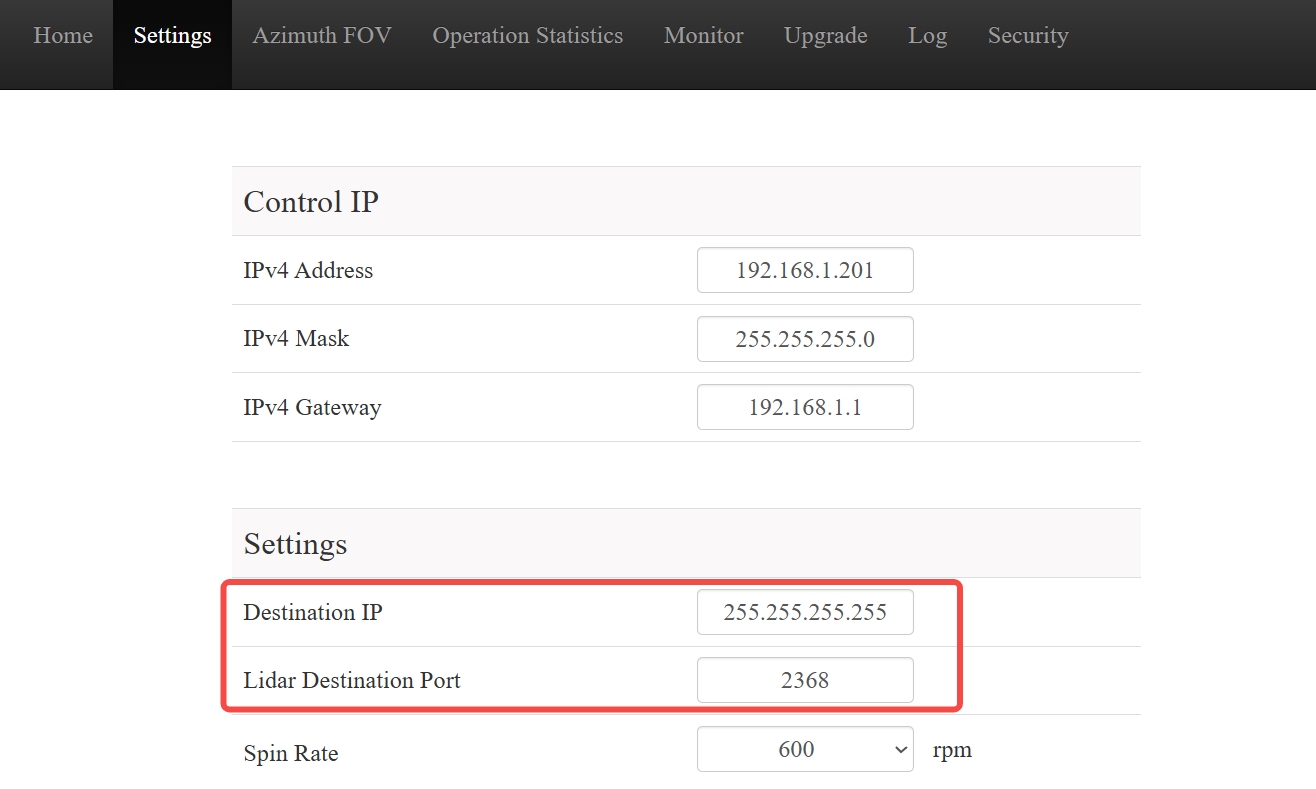
Hesai lidar supports the point cloud data transmission via setting the destination IP address (unicast/broadcast/multicast) and destination port (as shown in the figures below):
Web control page (Pandar series/QT series/XT series)
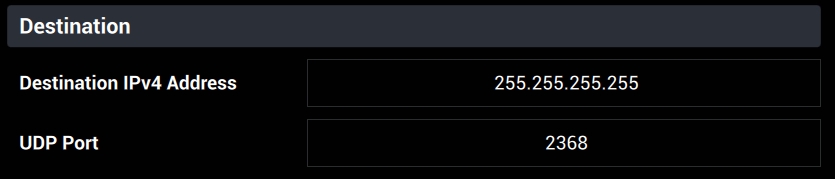
lidarUtilities interface (OT128 / AT128P)
2.2.1 Unicast
The lidar only sends data to a device with a fixed IP address.
2.2.1.1 lidar Settings
- Set the destination IP address to a specific value on lidar webpage or lidarUtilities, e.g. 192.168.1.100;
- Set the destination port to a specific value, e.g. 2368.
2.2.1.2 Host Computer Settings
- Set the host computer IP address to lidar's unique unicast address, i.e. 192.168.1.100.
2.2.2 Broadcast
The lidar sends data to all devices in the network.
2.2.2.1 lidar Settings
- Set the destination IP address to 255.255.255.255 on lidar webpage or lidarUtilities;
- Set the destination port to a specific value, e.g. 2368.
2.2.2.2 Host Computer Settings
- Set the host computer IP address to the same subnet as the lidar IP address: if the lidar IP address is 192.168.1.201 and the subnet mask is 255.255.255.0, the host computer IP address can be set to 192.168.1.X (1~200,202~254).
2.2.3 Multicast
The lidar sends data to a specific set of devices in the network.
2.2.3.1 lidar Settings
- Set the destination IP address to any value in the range of 239.0.0.0 to 239.255.255.255 on lidar webpage or lidarUtilities, e.g. 239.193.0.1;
- Set the destination port to a specific value, e.g. 2368.
2.2.3.2 Host Computer Settings
- Ensure the host computer IP address and lidar IP address are in the same subnet: if the lidar IP address is 192.168.1.201 and the subnet mask is 255.255.255.0, the host computer IP address can be set to 192.168.1.X (1~200,202~254);
- Add the multicast destination IP address to the routing table (Ubuntu).
  sudo ifconfig eth0 multicast # enable multicast
  sudo route add -net Multicast_IP  netmask 255.255.255.255 dev Ethernet_Name
  # Multicast_IP replaced to lidar's destination IP address, e.g. 239.193.0.1
  # Ethernet_Name replaced to host computer network interface name, e.g. eno1
2.3 How to use VLAN
2.3.1 Windows OS
2.3.1.1 Install VLAN Driver
- Open Device manager --- Network adaptor, check the brand of the network interface card, which is generally either Intel or Realtek:
- If it is a Realtek network interface card, refer to the following link to install:Realtek VLAN Driver;
- If it is an Intel network interface card, refer to the following link to install:Intel VLAN Driver;
2.3.1.2 VLAN Configuration
Click on the [Configure] button below the network interface card model --- Select the [Advanced] tab in the [Properties] list and select [VLAN ID] --- enter VLAN ID.

2.3.2 Ubuntu OS
2.3.2.1 Install VLAN Driver
Run the following command in Terminal:
bash
sudo apt-get install vlan
sudo modprobe 8021q
sudo modinfo 8021q # check if the driver is correctly implemented
2.3.2.2 VLAN Configuration
Run the following command in Terminal:
bash
##Configure VLAN:
sudo ip link add link ${interface_name} name ${interface_name}.${vlan_id} type vlan id ${vlan_id}
sudo ip link set up ${interface_name}.${vlan_id}
sudo ip addr add ${ip_addr}/24 dev ${interface_name}.${vlan_id}
ip addr show ${interface_name}.${vlan_id}


# ${interface_name} replaced to host computer network interface name


# ${vlan_id} replaced to host computer VLAN ID


# ${ip_addr} replaced to host computer IP address

##Remove VLAN ID:
sudo ifconfig yourEthernetName.1 down
sudo vconfig rem yourEthernetName.1 #Remove VLAN ID 1
3 Common Ethernet Issues Troubleshooting
3.1 lidar IP address can be PINGed, but lidar control page is accessible on host computer
- Confirm whether the lidar IP address entered on the web browser or lidarUtilities software is correct;
- For lidarUtilities, confirm whether the currently used software version supports the lidar model;
- For webpage login, clear the browser cache, restart the browser and log in to the lidar IP address again. Note: It is recommended to use the latest version Google Chrome or Firefox browser for web login.
3.2 lidar IP address cannot be PINGed, and lidar control page is not accessible on host computer
- Check and confirm whether the current network is connected properly (could re-plug and test). If a connection box is used, confirm whether the ethernet cable currently in use is functioning properly (could replace it with another cable for cross verification).
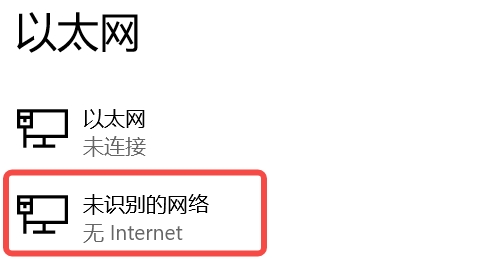
Note: When the lidar is booted and connected to the Ethernet of the Windows OS PC through an Ethernet cable, a new "Unidentified network" icon will be displayed in the "Network and Internet - Ethernet" configuration interface (as shown in the figure below)
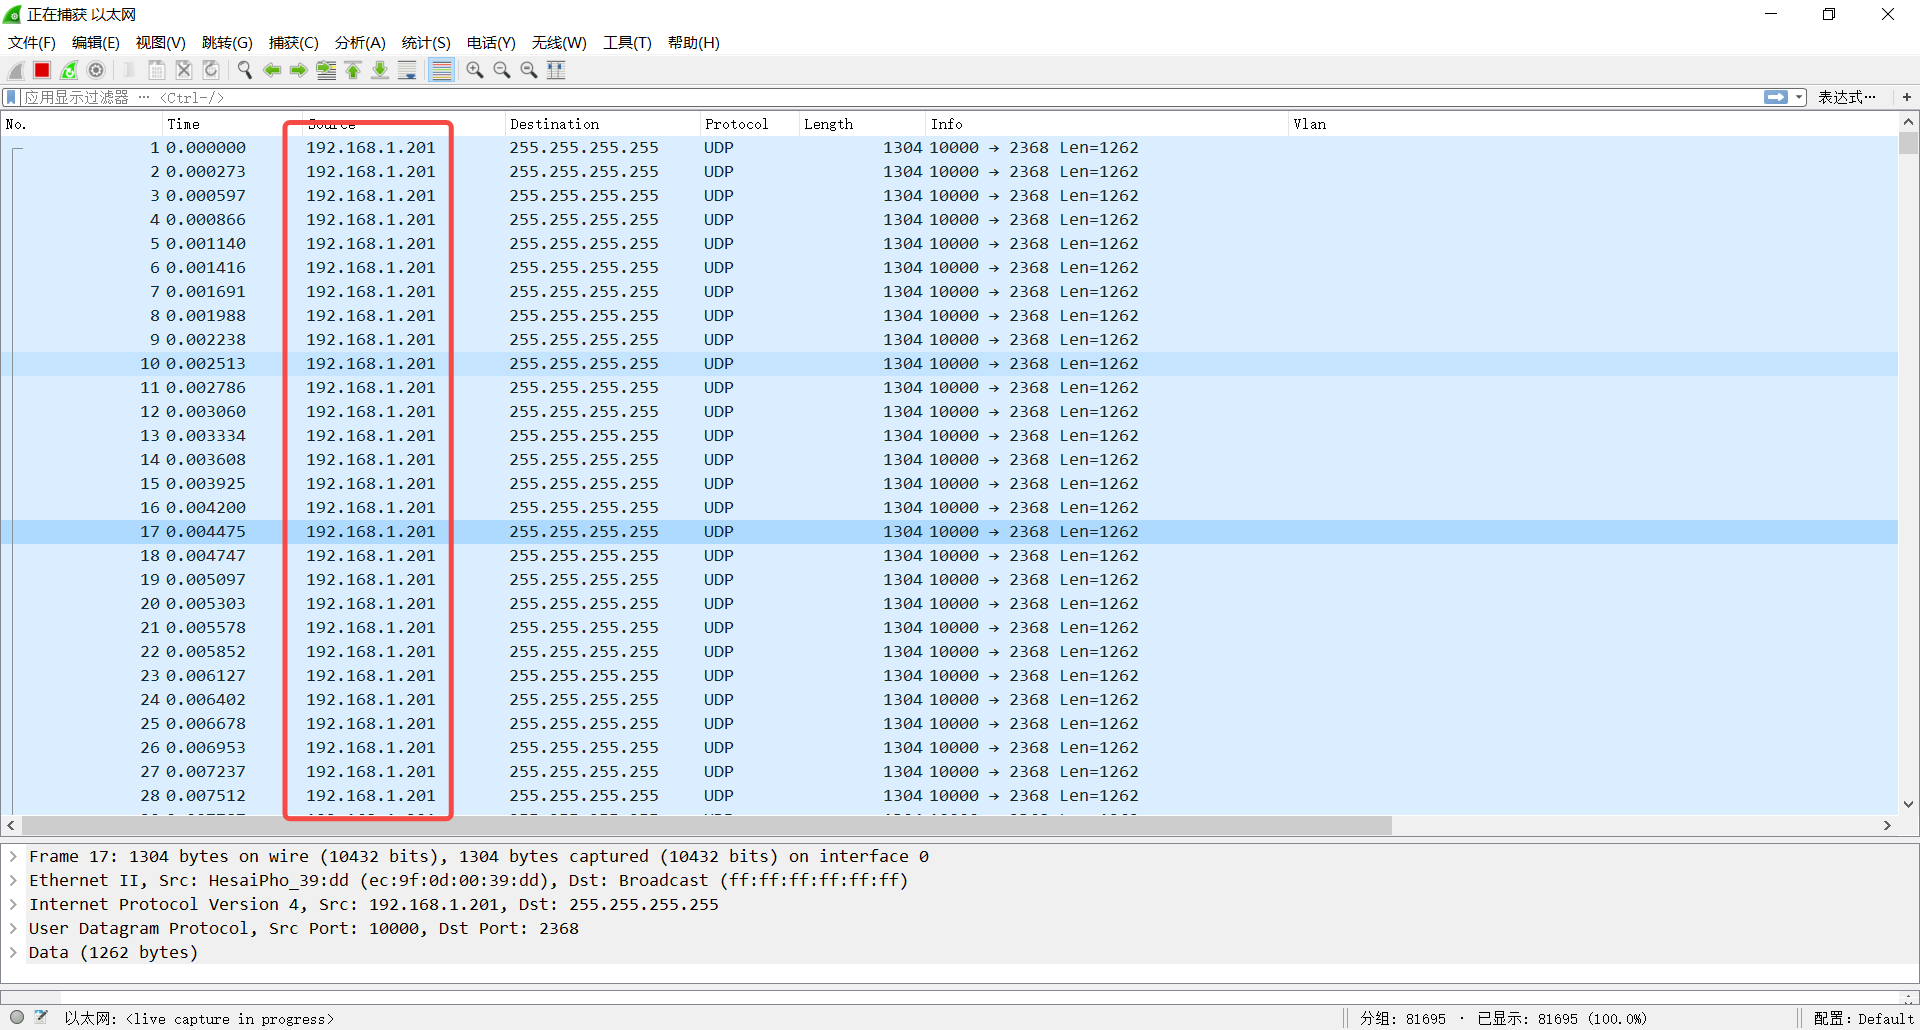
- Check whether the network configuration of the host computer is correct. For details, see How to establish the network connection between lidar and host computer. If you are unsure about the IP address of the current lidar, you can use the Wireshark software (Download link) to view the data stream information received by the current network interface.
- For a lidar configured in broadcast mode, the 'Source' column corresponding to the point cloud UDP data packet received in Wireshark is the current IP address for the lidar, as shown in the following figure:
- For a lidar configured in unicast mode, if the host IP address is not the destination IP address set by the lidar, the lidar IP address cannot be obtained as shown in the figure above. In this case, you can locate to the ARP broadcast packet with a length of 60 bytes in Wireshark (refer to the figure below):
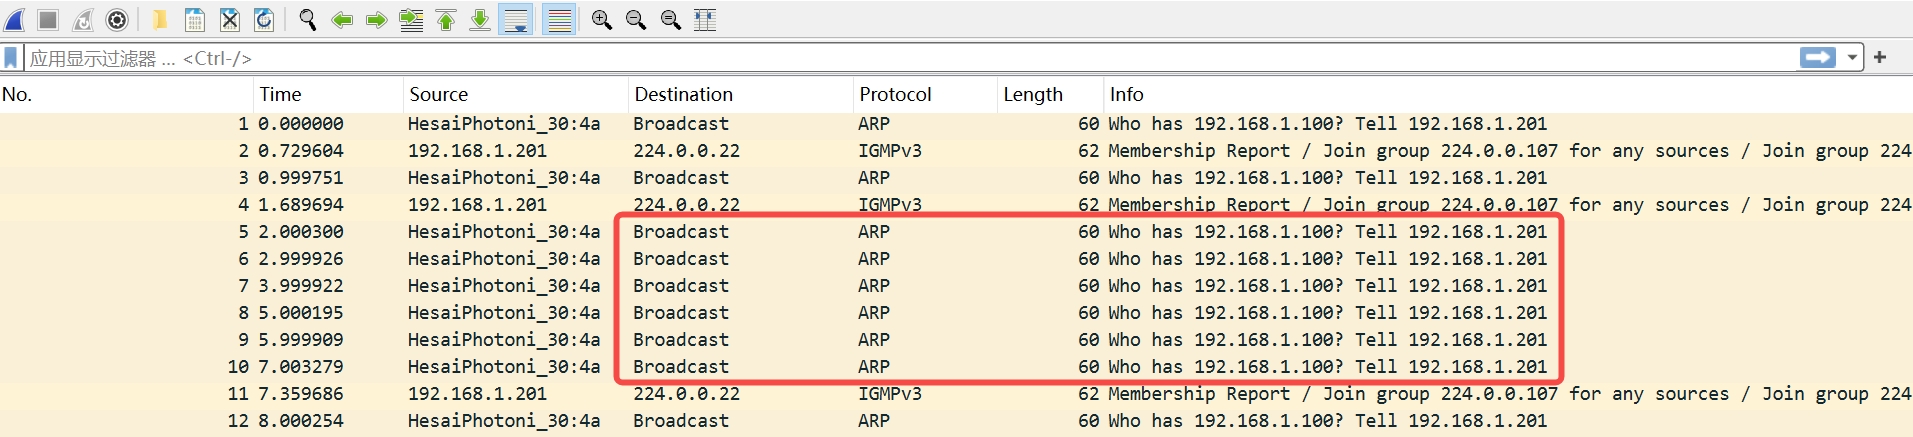
The first IP address (192.168.1.100) in the packet message corresponds to the destination IP address of the current lidar (i.e., the IP address that the host computer should be set to), while the second IP address (192.168.1.201) corresponds to the IP address of the current lidar itself.
- Check whether VLAN is enabled in the lidar is set with a VLAN ID by using Wireshark on Ubuntu OS(refer to the figure below):
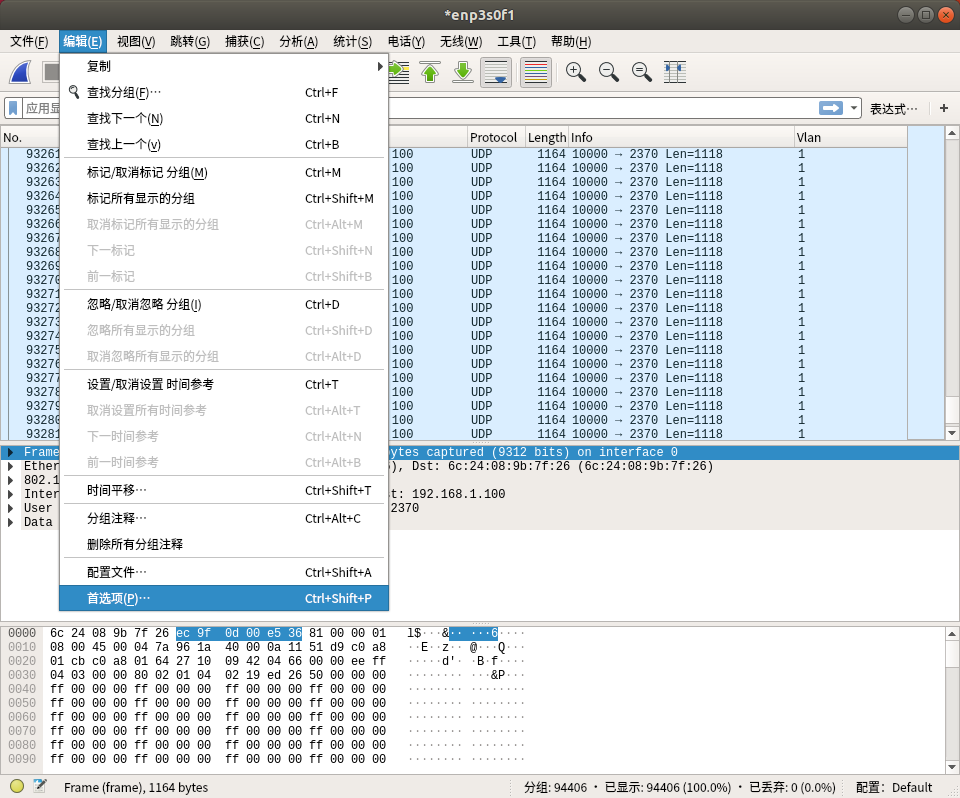
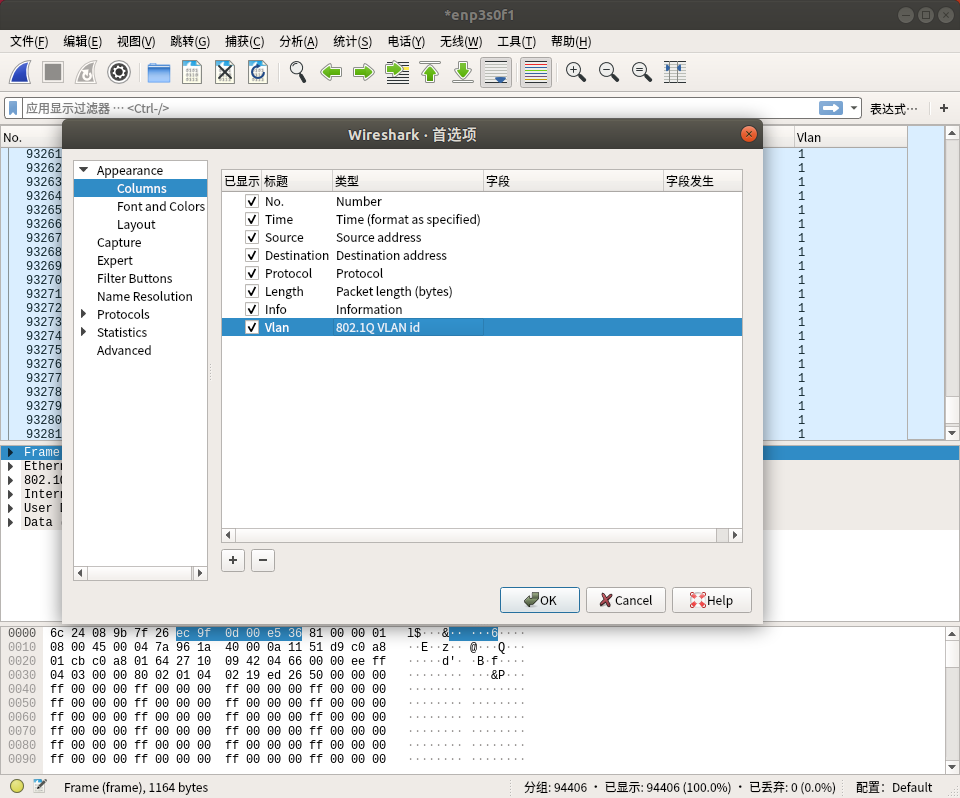
If it is confirmed that the current lidar has been configured with a VLAN ID, the host computer needs to be configured with the same VLAN ID. For specific methods, please refer to How to use VLAN.
If other Ethernet configuration issues persist after following the above steps, please contact Hesai Technical Support.
Find it useful?